NestJS 入门(三)用户登录与JWT
前言
本文主要探讨在 NestJS 中实现登录功能并签发 JWT Token ,使用的库有:
-
node.bcrypt.js
-
passport.js
-
@nestjs/jwt
加密用户密码
目前我们的数据库中的密码是明文存储的,明显是极不安全的,因此我们这里使用第三方库来对密码进行加密,然后再存入数据库中。
首先我们安装库:
1
2
| pnpm i -S bcrypt
pnpm i -D @types/bcrypt
|
前端会将用户的username和password传给后端,然后后端再将password进行加密,最后存入数据库。TypeORM 提供一个装饰器@BeforeInsert,它的功能是在数据插入数据库前执行一个函数,符合我们现在的需求。因此接下来我们需要修改user.entity.ts:
1
2
3
4
5
6
7
8
9
10
11
12
13
14
15
16
17
18
|
import { BeforeInsert, ... , PrimaryGeneratedColumn } from 'typeorm';
import * as bcrypt from 'bcrypt';
@Entity()
export class User {
@PrimaryGeneratedColumn()
id: number;
...
@BeforeInsert()
async hashPassword() {
if (this.password) this.password = bcrypt.hashSync(this.password, 10);
}
}
|
此时我们重新创建一个用户:
1
2
3
| curl --location --request POST 'http://localhost:3000/user/' \
--data-urlencode 'username=袁洋' \
--data-urlencode 'password=123456'
|
1
2
3
4
5
6
7
8
9
10
11
| {
"code": 0,
"message": "请求成功",
"data": {
"username": "袁洋",
"password": "$2b$10$Q4Ra7wjNSBCMVKHtbRUf4.rc.jr.wXSvolAI8IAJppUU8LB0AMgvW",
"id": 13,
"created_at": "2023-07-13T00:51:13.030Z",
"updated_at": "2023-07-13T00:51:13.030Z"
}
}
|
查看数据库:
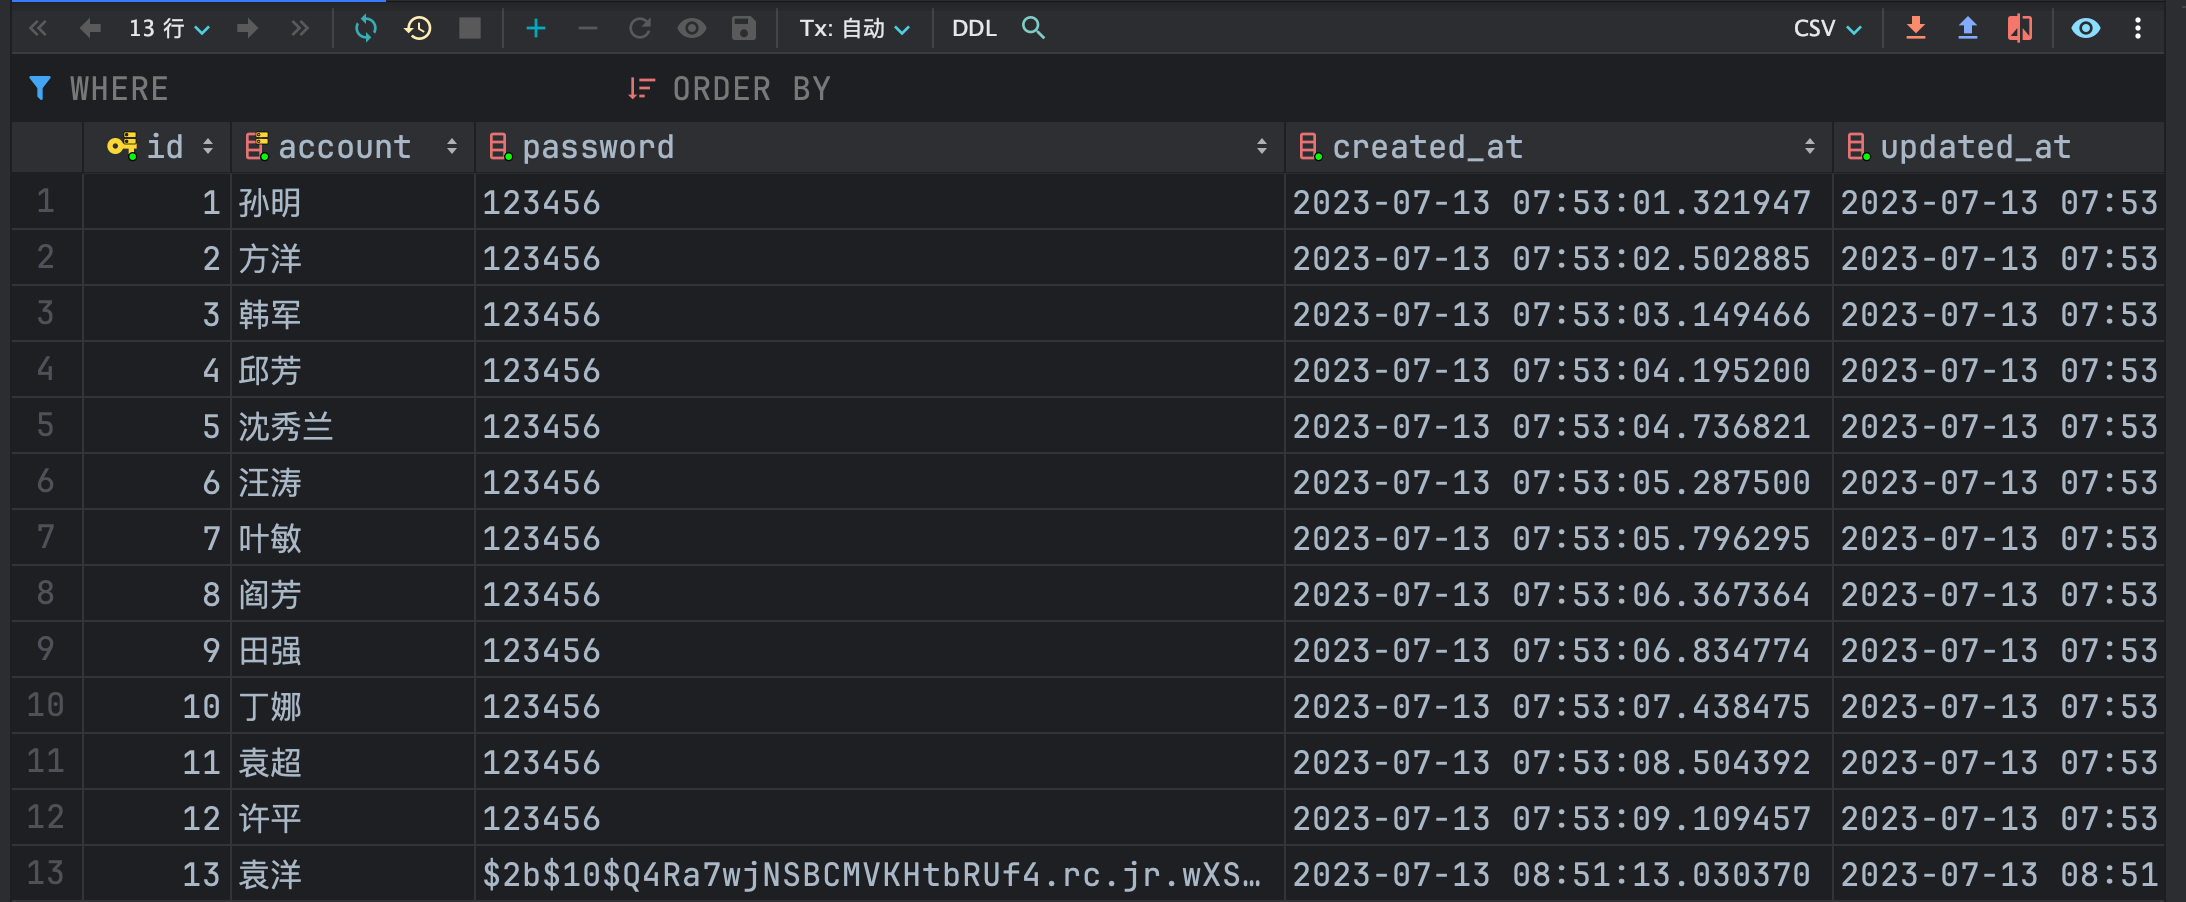
可以看到数据库中的密码字段也已经更新。
细心的读者可能会发现,返回的数据中包含password字段,而大多数情况下不需要返回这个字段,因此需要剔除。
剔除有两种方法:
-
拿到用户数据后,剔除password字段,再将其他字段返回。
-
从数据库中读取用户数据时,就不读取password字段。
本文选择第二种方式。
修改user.entity.ts:
1
2
3
4
5
6
7
8
9
10
11
12
13
14
15
16
| ...
@Entity()
export class User {
@PrimaryGeneratedColumn()
id: number;
@Column({ name: 'account', unique: true })
username: string;
@Column({ select: false })
password: string;
...
}
|
该选项会在查表时跳过当前字段。
测试效果:
1
| curl --location --request GET 'http://localhost:3000/user/1'
|
响应:
1
2
3
4
5
6
7
8
9
10
| {
"code": 0,
"message": "请求成功",
"data": {
"id": 1,
"username": "孙明",
"created_at": "2023-07-12T23:53:01.321Z",
"updated_at": "2023-07-12T23:53:01.321Z"
}
}
|
可以看到结果中已经没有password字段。
登录接口
passport.js是 Node.js 中非常著名的一个用于做身份认证的包,它主要依靠策略(Strategy)来进行验证,因此我们还需要一个策略。在本次实践中,我们实现的是本地身份验证,因此我们使用passport-local这个策略。
安装依赖:
1
2
| pnpm i -S @nestjs/passport passport passport-local
pnpm i -D @types/passport @types/passport-local
|
创建策略文件,由于 NestJS 并没有提供创建策略文件的命令,因此我们需要手动创建文件:
1
2
3
4
5
6
7
8
9
10
11
12
13
14
15
16
17
18
19
20
21
22
23
24
25
26
27
28
29
30
31
32
33
34
35
36
37
|
import { PassportStrategy } from '@nestjs/passport';
import { Strategy } from 'passport-local';
import type { IStrategyOptions } from 'passport-local';
import { InjectRepository } from '@nestjs/typeorm';
import { Repository } from 'typeorm';
import { compareSync } from 'bcrypt';
import { BadRequestException } from '@nestjs/common';
import { User } from 'src/user/entities/user.entity';
export class LocalStrategy extends PassportStrategy(Strategy) {
constructor(
@InjectRepository(User) private readonly userRepository: Repository<User>,
) {
super({
usernameField: 'username',
passwordField: 'password',
} as IStrategyOptions);
}
async validate(username: string, password: string): Promise<any> {
const user = await this.userRepository
.createQueryBuilder('user')
.addSelect('user.password')
.where('user.username=:username', { username })
.getOne();
if (!user) throw new BadRequestException('用户不存在');
if (!compareSync(password, user.password))
throw new BadRequestException('密码错误');
return user;
}
}
|
这里我们导出了一个类LocalStrategy,继承自PassportStrategy,这个类首先需要指明两个字段usernameField和passwordField,一般来说用户登录都会提供至少两个字段,例如用户名(username)和密码(password),或者电子邮箱(email)和密码(password)等等,我们需要告知我们的策略,从请求的body中取哪两个字段用于验证。在本例中,我们使用的是username和password。
策略还必须实现一个方法validate(),这个方法会接受我们上面指定的两个字段作为参数,然后就需要查表,查出用户名对应的密码,进行比较。
注意,由于我们在实体中设置了password字段的 select : false,因此我们使用find()方法是不会返回password字段的,因此我们需要使用createQueryBuilder()方法创建一个查询命令,再通过addSelect()方法手动将password字段添加上,这样查询到的数据中就会包含我们所需的password字段。
创建好了策略,我们还需要一个登录接口,一般来说我们的登录地址为/auth/login,因此我们创建对应的文件:
1
2
| nest g mo auth
nest g co auth
|
1
2
3
4
5
6
7
8
9
10
11
12
13
14
15
16
17
18
19
20
21
22
23
24
25
26
27
28
|
import { Module } from '@nestjs/common';
import { AuthController } from './auth.controller';
import { LocalStrategy } from 'src/global/strategy/local.strategy';
import { TypeOrmModule } from '@nestjs/typeorm';
import { User } from 'src/user/entities/user.entity';
@Module({
imports: [TypeOrmModule.forFeature([User])],
controllers: [AuthController],
providers: [LocalStrategy],
})
export class AuthModule {}
import { Controller, Post, UseGuards } from '@nestjs/common';
import { AuthGuard } from '@nestjs/passport';
@Controller('auth')
export class AuthController {
@UseGuards(AuthGuard('local'))
@Post('login')
login() {
return 'login';
}
}
|
测试一下:
1
2
3
4
| curl --location --request POST 'http://localhost:3000/auth/login' \
--header 'Content-Type: application/x-www-form-urlencoded' \
--data-urlencode 'username=wang' \
--data-urlencode 'password=123456'
|
响应成功:
1
2
3
4
5
| {
"code": 0,
"message": "请求成功",
"data": "login"
}
|
响应失败:
1
2
3
4
5
6
7
8
9
10
11
12
13
|
{
"code": 400,
"message": "用户不存在",
"content": {}
}
{
"code": 400,
"message": "密码错误",
"content": {}
}
|
签发 JWT Token
一般来说,登录成功之后会有两种记录登录状态的方式,一种是 Session ,一种是 Token ,本例中使用 JWT Token 。关于 JWT Token ,我也写了一篇文章,感兴趣的读者可以移步我的博客查看。
安装依赖:
修改auth模块:
1
2
3
4
5
6
7
8
9
10
11
12
13
14
15
16
17
18
19
20
| import { Module } from '@nestjs/common';
import { AuthController } from './auth.controller';
import { LocalStrategy } from 'src/global/strategy/local.strategy';
import { TypeOrmModule } from '@nestjs/typeorm';
import { User } from 'src/user/entities/user.entity';
import { JwtModule } from '@nestjs/jwt';
const jwtModule = JwtModule.register({
secret: 'suibianshenme',
signOptions: { expiresIn: '4h' },
});
@Module({
imports: [TypeOrmModule.forFeature([User]), jwtModule],
controllers: [AuthController],
providers: [LocalStrategy],
exports: [jwtModule],
})
export class AuthModule {}
|
添加auth.service.ts,分离登录逻辑:
修改auth.controller.ts:
1
2
3
4
5
6
7
8
9
10
11
12
13
14
| import { Controller, Post, Req, UseGuards } from '@nestjs/common';
import { AuthGuard } from '@nestjs/passport';
import { AuthService } from './auth.service';
import type { Request } from 'express';
@Controller('auth')
export class AuthController {
constructor(private readonly authService: AuthService) {}
@UseGuards(AuthGuard('local'))
@Post('login')
login(@Req() req: Request) {
return this.authService.login(req.user);
}
}
|
这里的req.user是我们的策略local.strategy.ts,最后验证成功后return user挂载上去的。
修改auth.service.ts:
1
2
3
4
5
6
7
8
9
10
11
12
13
14
15
16
17
18
19
| import { Injectable } from '@nestjs/common';
import { JwtService } from '@nestjs/jwt';
import { User } from 'src/user/entities/user.entity';
@Injectable()
export class AuthService {
constructor(private jwtService: JwtService) {}
async login(user: Partial<User>) {
const payload = { username: user.username, id: user.id };
const access_token = this.jwtService.sign(payload);
return {
access_token,
type: 'Bearer',
};
}
}
|
测试一下:
1
2
3
4
| curl --location --request POST 'http://localhost:3000/auth/login' \
--header 'Content-Type: application/x-www-form-urlencoded' \
--data-urlencode 'username=wang' \
--data-urlencode 'password=123456'
|
响应:
1
2
3
4
5
6
7
8
| {
"code": 0,
"message": "请求成功",
"data": {
"access_token": "eyJhbGciOiJIUzI1NiIsInR5cCI6IkpXVCJ9.eyJ1c2VybmFtZSI6IndhbmciLCJpZCI6MTQsImlhdCI6MTY4OTMwNjc0NywiZXhwIjoxNjg5MzIxMTQ3fQ.QrV8vjQatf7KYaM6fwckNSuNC2A08IUFyGkJzMehzaw",
"type": "Bearer"
}
}
|
至此,实现签发 JWT token 。
验证 JWT Token
用户在请求需要身份验证的接口时,会在请求的headers中增加一个字段Authorization : Bearer {token},接下来我们就从请求头中取出 token 并进行验证。
我们使用的passport.js也提供了相应的策略passport-jwt,帮助我们进行验证。
安装依赖:
1
2
| pnpm i -S passport-jwt
pnpm i -D @types/passport-jwt
|
创建新的策略:
1
2
3
4
5
6
7
8
9
10
11
12
13
14
15
16
17
18
19
20
21
22
23
24
25
26
27
28
29
30
31
|
import { PassportStrategy } from '@nestjs/passport';
import { InjectRepository } from '@nestjs/typeorm';
import { Repository } from 'typeorm';
import { ExtractJwt, Strategy } from 'passport-jwt';
import type { StrategyOptions } from 'passport-jwt';
import { Injectable, UnauthorizedException } from '@nestjs/common';
import { User } from 'src/user/entities/user.entity';
@Injectable()
export class JwtStrategy extends PassportStrategy(Strategy) {
constructor(
@InjectRepository(User) private readonly userRepository: Repository<User>,
) {
super({
jwtFromRequest: ExtractJwt.fromAuthHeaderAsBearerToken(),
secretOrKey: 'suibianshenme',
} as StrategyOptions);
}
async validate(payload: User) {
const existUser = await this.userRepository.findOne({
where: { id: payload.id },
});
if (!existUser) throw new UnauthorizedException('token验证失败');
return existUser;
}
}
|
策略的内容与local策略基本一致,通过包提供的ExtractJwt.fromAuthHeaderAsBearerToken()方法可以自动从headers中提取Authorization中的 token ,并且会自动去除开头的Bearer 前缀。注意这里的secretOrKey需要和签发时的secret一致。
策略必须实现一个方法validate(),其中的参数payload是我们签发的 JWT Token 中的payload部分:
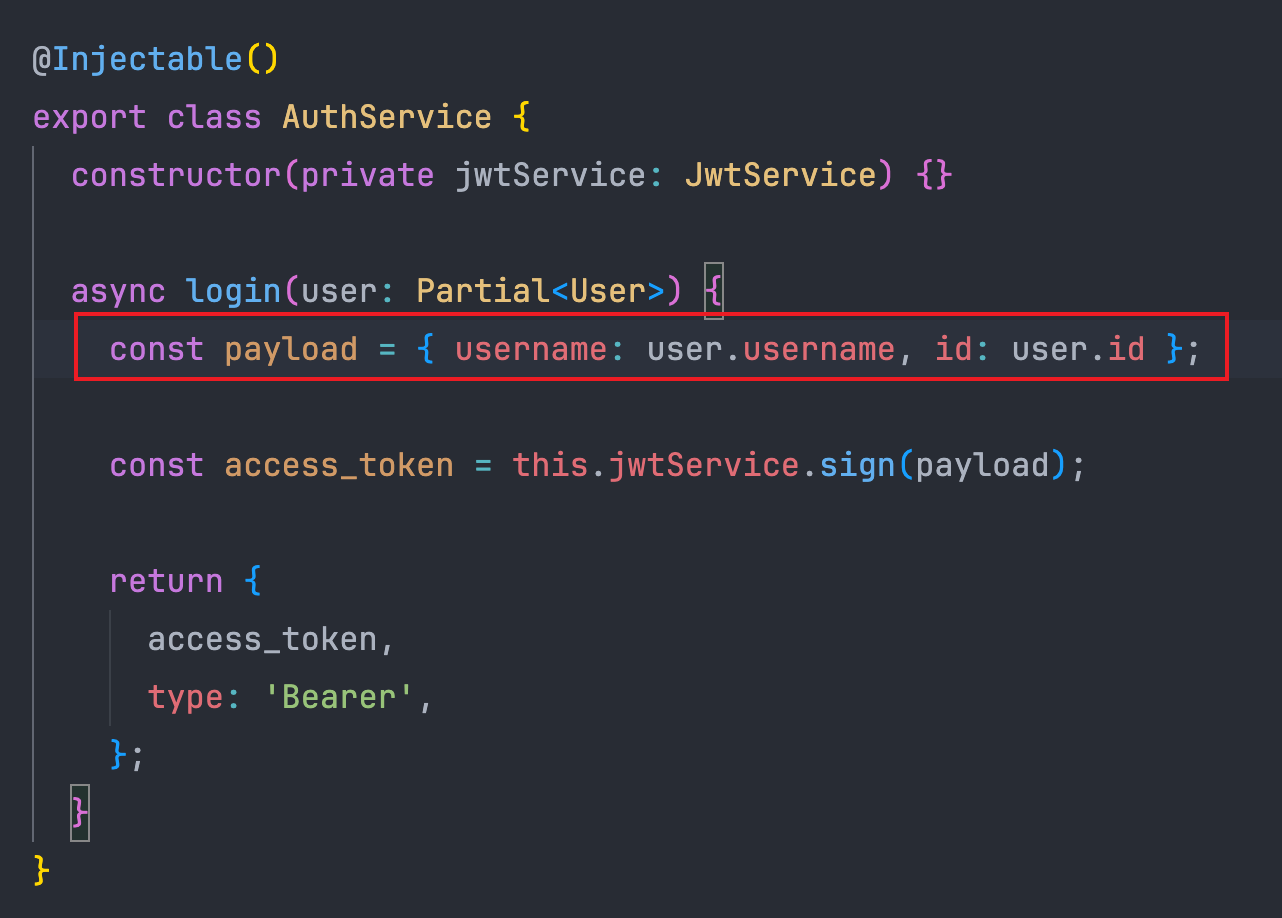
所以payload这里其实是一个对象,包含了username和id字段。
创建好策略后,我们还需要注册这个策略。
例如我们给获取用户信息接口GET /user/{id}加入 Token 验证:
1
2
3
4
5
6
7
8
9
10
11
12
13
14
15
16
17
18
19
20
21
22
23
24
25
26
27
28
29
30
31
32
33
34
35
36
37
38
39
|
import { Module } from '@nestjs/common';
import { UserService } from './user.service';
import { UserController } from './user.controller';
import { TypeOrmModule } from '@nestjs/typeorm';
import { User } from './entities/user.entity';
import { JwtStrategy } from 'src/global/strategy/jwt.strategy';
@Module({
imports: [TypeOrmModule.forFeature([User])],
controllers: [UserController],
providers: [UserService, JwtStrategy],
})
export class UserModule {}
import {
...,
UseGuards,
} from '@nestjs/common';
import { AuthGuard } from '@nestjs/passport';
@Controller('user')
export class UserController {
constructor(private readonly userService: UserService) {}
...
@UseGuards(AuthGuard('jwt'))
@Get(':id')
findOne(@Param('id') id: string) {
return this.userService.findOne(+id);
}
...
}
|
测试一下:
1
| curl --location --request GET 'http://localhost:3000/user/1'
|
请求失败:
1
2
3
4
5
| {
"code": 401,
"message": "Unauthorized",
"content": {}
}
|
我们先登录,然后将得到的 JWT Token 加入到headers中,重新请求:
1
2
| curl --location --request GET 'http://localhost:3000/user/1' \
--header 'Authorization: Bearer eyJhbGciOiJIUzI1NiIsInR5cCI6IkpXVCJ9.eyJ1c2VybmFtZSI6IndhbmciLCJpZCI6MTQsImlhdCI6MTY4OTMxNDY3NywiZXhwIjoxNjg5MzI5MDc3fQ.KMXnv3X_CIZHwRdnFxMPIbs_H5_mMKpE3oDqcMICWh8'
|
请求成功:
1
2
3
4
5
6
7
8
9
10
| {
"code": 0,
"message": "请求成功",
"data": {
"id": 1,
"username": "孙明",
"created_at": "2023-07-12T23:53:01.321Z",
"updated_at": "2023-07-12T23:53:01.321Z"
}
}
|
但是如果对每个接口都加一个@UseGuard(AuthGuard('jwt'))显然是繁琐且重复的,绝大多数接口都是需要验证身份的,只有诸如登录一类的接口是不需要认证的,因此我们下一步就是全局注册。
将 Token 验证应用到全局
首先我们需要理清思路:
做排除
我们可以维护一个白名单,在策略中验证请求的 url 是否在白名单中,如果是则跳过验证。这里笔者就不展开了。
做标记
我们自定义一个装饰器@Public来标记接口是否为公共接口,所有被标记的接口都可以不需要身份验证。
在/src/global/decorator目录下创建一个public.decorator.ts:
1
2
3
4
| import { SetMetadata } from '@nestjs/common';
export const IS_PUBLIC_KEY = 'isPublic';
export const Public = () => SetMetadata(IS_PUBLIC_KEY, true);
|
这里主要是使用了SetMetadata()方法,给接口设置了一个元数据(Metadata)isPublic : true
然后给接口加上这个标记:
1
2
3
4
5
6
7
8
9
10
11
12
13
14
|
...
@Controller('auth')
export class AuthController {
constructor(private readonly authService: AuthService) {}
@Public()
@UseGuards(AuthGuard('local'))
@Post('login')
login(@Req() req: Request) {
return this.authService.login(req.user);
}
}
|
删除我们之前加在user.controller.ts中的代码:
1
2
3
4
5
6
7
8
9
10
11
12
13
14
15
16
17
18
19
20
21
22
|
import {
...,
UseGuards,
} from '@nestjs/common';
import { AuthGuard } from '@nestjs/passport';
@Controller('user')
export class UserController {
constructor(private readonly userService: UserService) {}
...
@Get(':id')
findOne(@Param('id') id: string) {
return this.userService.findOne(+id);
}
...
|
定制一个 Guard
在 Nest.js 中,Guard(守卫)是一种用于保护路由和执行权限验证的特殊类型组件。它允许您在请求到达路由处理程序之前对请求进行拦截,并根据特定条件来允许或拒绝请求的访问。
Guard 可以用于实现各种身份验证和授权策略,例如基于角色的访问控制、JWT 验证、OAuth 认证等。它们可以在路由级别或处理程序级别应用,以确保请求的安全性和合法性。
Guard 类必须实现 CanActivate 接口,并实现 canActivate() 方法来定义守卫的逻辑。在该方法中,您可以根据请求的特征、用户信息、权限等进行验证,并返回一个布尔值来表示是否允许请求继续执行。
在/src/global/guard目录下创建一个jwt-auth.guard.ts:
1
2
3
4
5
6
7
8
9
10
11
12
13
14
15
16
17
18
19
20
21
22
23
24
25
26
| import type { ExecutionContext } from '@nestjs/common';
import { Injectable } from '@nestjs/common';
import { AuthGuard } from '@nestjs/passport';
import { Reflector } from '@nestjs/core';
import type { Observable } from 'rxjs';
import { IS_PUBLIC_KEY } from '../decorator/public.decorator';
@Injectable()
export class JwtAuthGuard extends AuthGuard('jwt') {
constructor(private reflector: Reflector) {
super();
}
canActivate(
context: ExecutionContext,
): boolean | Promise<boolean> | Observable<boolean> {
const isPublic = this.reflector.getAllAndOverride<boolean>(IS_PUBLIC_KEY, [
context.getHandler(),
context.getClass(),
]);
if (isPublic) return true;
return super.canActivate(context);
}
}
|
这里的 Guard 必须实现一个canActive()方法,本例中,我们通过Reflector拿到了通过装饰器设置的元数据isPublic,如果其为true,继续执行请求的逻辑,如果为false,将请求传递给其他代码执行。
在app.module.ts中注册这个 Guard:
1
2
3
4
5
6
7
8
9
10
11
12
13
14
15
16
17
| import { Module } from '@nestjs/common';
import { AppService } from './app.service';
...
import { JwtAuthGuard } from './global/guard/jwt-auth.guard';
import { APP_GUARD } from '@nestjs/core';
@Module({
...
providers: [
AppService,
{
provide: APP_GUARD,
useClass: JwtAuthGuard,
},
],
})
export class AppModule {}
|
这时我们重新请求GET /user/{id}和GET /user,都会提示未验证,但是我们请求POST /auth/login是没问题的,至此 JWT 验证部分就结束了。
环境变量
截至目前,我们的项目中有两个敏感信息是明文写在代码中的,一个是我们连接数据库的信息,一个是我们签发 JWT Token 的密钥。出于安全性考虑,我们一般会将这些数据写在环境变量中,让我们的代码运行时从环境变量中读取。
创建.env.local文件,用于本地开发,创建.env.prod用于生产环境,这里以.env.local为例:
1
2
3
4
5
6
7
8
9
10
|
DB_HOST=localhost
DB_PORT=3306
DB_USERNAME=root
DB_PASSWORD=123456
DB_DATABASE=nest-demo
JWT_SECRET=superNB
JWT_EXPIRES_IN=10m
|
在根目录/下新建config目录,用来存放我们读取环境变量的代码,并在该目录下创建文件envConfig.ts:
1
2
3
4
5
6
7
8
9
10
11
12
13
14
15
16
17
18
19
|
import * as fs from 'node:fs'
import * as path from 'node:path'
const isProd = process.env.NODE_ENV === 'production'
function parseEnv() {
const localEnv = path.resolve('.env.local')
const prodEnv = path.resolve('.env.prod')
if (!fs.existsSync(localEnv) && !fs.existsSync(prodEnv))
throw new Error('缺少环境配置文件')
const filePath = isProd && fs.existsSync(prodEnv) ? prodEnv : localEnv
return { path: filePath }
}
export default parseEnv()
|
安装依赖:
1
| pnpm i -S @nestjs/config
|
然后在app.module.ts中全局注册我们的config:
1
2
3
4
5
6
7
8
9
10
11
12
13
14
15
16
17
18
|
import { Module } from '@nestjs/common';
import { ConfigModule } from '@nestjs/config';
import envConfig from 'config/envConfig';
...
@Module({
imports: [
ConfigModule.forRoot({
isGlobal: true,
envFilePath: [envConfig.path],
}),
...
],
...
})
export class AppModule {}
|
然后也是在app.module.ts中将我们数据库信息替换成环境变量中读取的信息:
1
2
3
4
5
6
7
8
9
10
11
12
13
14
15
16
17
18
19
20
21
22
23
24
25
26
27
28
29
30
|
import { Module } from '@nestjs/common';
import { TypeOrmModule } from '@nestjs/typeorm';
import { ConfigModule, ConfigService } from '@nestjs/config';
...
@Module({
imports: [
...
TypeOrmModule.forRootAsync({
imports: [ConfigModule],
inject: [ConfigService],
useFactory: async (configService: ConfigService) => ({
type: 'mysql',
host: configService.get<string>('DB_HOST') ?? 'localhost',
port: configService.get<number>('DB_PORT') ?? 3306,
username: configService.get<string>('DB_USERNAME') ?? 'root',
password: configService.get<string>('DB_PASSWORD') ?? '123456',
database: configService.get<string>('DB_DATABASE') ?? 'nest-demo',
synchronize: true,
retryDelay: 500,
retryAttempts: 10,
autoLoadEntities: true,
}),
}),
],
...
})
export class AppModule {}
|
将原本代码中签发和验证 JWT 处的密钥进行替换:
1
2
3
4
5
6
7
8
9
10
11
12
13
14
15
16
17
18
|
import { JwtModule } from '@nestjs/jwt';
import { ConfigService } from '@nestjs/config';
...
const jwtModule = JwtModule.registerAsync({
inject: [ConfigService],
useFactory: async (configService: ConfigService) => ({
secret: configService.get('JWT_SECRET') ?? 'secret',
signOptions: {
expiresIn: configService.get('JWT_EXPIRES_IN') ?? '10m',
},
}),
});
...
export class AuthModule {}
|
1
2
3
4
5
6
7
8
9
10
11
12
13
14
15
16
17
18
19
20
21
22
23
24
|
import { PassportStrategy } from '@nestjs/passport';
import { ExtractJwt, Strategy } from 'passport-jwt';
import type { StrategyOptions } from 'passport-jwt';
import { Injectable, UnauthorizedException } from '@nestjs/common';
import { ConfigService } from '@nestjs/config';
...
@Injectable()
export class JwtStrategy extends PassportStrategy(Strategy) {
constructor(
...
private readonly configService: ConfigService,
) {
super({
jwtFromRequest: ExtractJwt.fromAuthHeaderAsBearerToken(),
secretOrKey: configService.get('JWT_SECRET') ?? 'secret',
} as StrategyOptions);
}
...
}
|
后记
笔者也是刚刚接触 Node ,目前还存在诸多不足,如果文章中有任何错误,欢迎在评论区批评指正。
Nest学习系列博客代码仓库 (github.com)
冷面杀手的个人站 (bald3r.wang)
NestJS 相关文章